Centos 安装ImageMagick 与 imagick for php步骤详解
时间:2017-12-19
现在有很多朋友在使用安装ImageMagick imagick for php了,今天自己也想做但是不知道如何操作,下面我来给大家介绍Centos 安装ImageMagick imagick for php步骤,各位同学可参考。
关于什么是ImageMagick
ImageMagick是一套软件系列,主要用于图片的创建、编辑以及转换等
Centos 安装ImageMagick
1. 依次运行以下命令
yum install ImageMagick yum install ImageMagick-devel yum install php-pear [for PECL] |
安装php-pear是为了使用pecl 中的 phpize , ERROR: `phpize’ failed
yum -y install php-devel |
2. 安装C编译器
yum install gcc |
如果装不了gcc就用这个命令:
yum install gcc gcc-c++ autoconf automake |
3. 安装imagick
pecl install imagick |
4. 加载imagick到php
在/etc/php.ini 加上extension=imagick.so
5. 重启service httpd restart
6. 使用 phpinfo() 或运行 php -m | grep imagick 来查看是否安装成功
另一种安装安装ImageMagick 与 imagick for php方法
1. 下载安装ImageMagick
wget ftp://mirror.aarnet.edu.au/pub/imagemagick/ImageMagick-6.6.8-10.tar.gz tar -xzvf ImageMagick-6.6.8-10.tar.gz ./configure --prefix=/usr/local/imagemagick make make install |
2. 下载安装Imagick
注:安装该扩展不要求安装ImageMagick
从http://pecl.php.net/package/imagick找到imagick的最新的版本
wget http://pecl.php.net/get/imagick-3.1.0RC1.tgz tar -xzvf imagick-3.1.0RC1 phpize ./configure --with-php-config=/usr/local/php/bin/php-config --with-imagick=/usr/local/imagemagick make make install |
make install执行结果显示:
Installing shared extensions: /usr/local/php/lib/php/extensions/no-debug-non-zts-20090626/ Installing header files: /usr/local/php/include/php/ |
生成imagick.so到/usr/local/php/lib/php/extensions/no-debug-non-zts-20090626/,
然后手动配置php.ini使其生效
小提示,安装方法都差不多都是在linux中,只是有一种和linux命令,另一种使用了Centos命令了。
相关文章
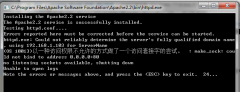 安装 Apache 出现
 以一种访问权限不允许的方式做了一个访问套接字的尝试 安装 Apache 出现 OS 10013 以一种访问权限不允许的方式做了一个访问套接字的尝试 如下截图: 提示: make_sock: could not bind to address 0.0.0.0:80 这个问 CentOS7下编译安装tesseract-ocr流程什么是tesseract-ocr OCR(Optical Character Recognition):光学字符识别,是指对图片文件中的文字进行分析识别,获取的过程。 Tesseract:开源的OCR识别引擎,初
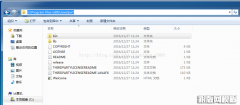 JRE的安装及环境变量配置JRE(Java Runtime Environment,Java运行环境),运行JAVA程序所必须的环境的集合,包含JVM标准实现及Java核心类库。 下载解压,然后双击安装,跟普通安装程序
- centos中安装字体在使用phantomjs做自动化网页截图时,发现截图都没有文字。最后好久才发现是centos中没有安装字体的原因。 安装方法: 1.用fontconfig来安装字体库: yum -y ins
- 如何增加CentOS(Linux)的字体1、在网上找到你要的目标字体。 2、上传到CentOS 7系统的 /usr/share/fonts 目录中。 3、执行# sudo mkfontscale(如果命令不存在,请yum安装mkfontscale)。 4
- linux下openoffice启动和自动启动设置(centos)一、启动步骤: 1.cd /opt/openoffice4/program (安装路径) 2.运行命令 soffice -headless -accept=socket,host=127.0.0.1,port=8100;urp; -nofirststartwizar
 网站无法加载woff字体文件的解决办法?有客户反馈在安装网站后,woff、woff2字体无法加载,导致无法显示图标文件,这种情况要怎么解决呢? 这是因为服务器IIS默认是没有SVG,WOFF,WOFF2这几个文件类型的扩展的,
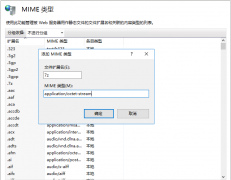 网站服务器不支持.7z文件下载的解决方法7-Zip是一款号称有着现今最高压缩比的压缩软件,它不仅支持独有的7z文件格式,而且还支持各种其它压缩文件格式,其中包括ZIP, RAR, CAB, GZIP, BZIP2和TAR。此软件压缩的压