javascript动画之模拟拖拽效果篇
时间:2023-12-09下面我来详细讲解“javascript动画之模拟拖拽效果篇”的完整攻略。
简介
在前端开发中,拖拽是常见的交互效果之一,可以大大提升用户体验。本篇文章将介绍如何用javascript实现模拟拖拽效果。
实现原理
要实现拖拽效果,需要用到鼠标事件(mousedown、mousemove、mouseup),在mousedown事件中获取鼠标的坐标,然后在移动鼠标时监听mousemove事件,在mousemove事件中计算元素应该移动的偏移量,并改变元素的位置,最后在mouseup事件中完成拖拽操作。
实现步骤
- 给需要拖拽的元素添加mousedown事件监听器,获取鼠标在元素内的坐标,计算元素左上角的坐标(element.offsetLeft、element.offsetTop)。
const element = document.getElementById("drag-element");
let mouseX, mouseY;

element.addEventListener("mousedown", function(event) {
  mouseX = event.clientX - element.offsetLeft;
  mouseY = event.clientY - element.offsetTop;
});
- 给document对象添加mousemove事件监听器,计算元素应该移动的偏移量,更新元素的位置。
document.addEventListener("mousemove", function(event) {
  if (mouseX !== undefined && mouseY !== undefined) {
    let moveX = event.clientX - mouseX;
    let moveY = event.clientY - mouseY;

    element.style.left = moveX + "px";
    element.style.top = moveY + "px";
  }
});
- 给document对象添加mouseup事件监听器,完成拖拽操作。
document.addEventListener("mouseup", function(event) {
  mouseX = undefined;
  mouseY = undefined;
});
示例1:拖拽一个图片
首先在html页面中添加一张图片:
<img id="drag-image" src="image.jpg" width="200" height="200">
然后在javascript中实现拖拽效果:
const image = document.getElementById("drag-image");
let mouseX, mouseY;

image.addEventListener("mousedown", function(event) {
  mouseX = event.clientX - image.offsetLeft;
  mouseY = event.clientY - image.offsetTop;
});

document.addEventListener("mousemove", function(event) {
  if (mouseX !== undefined && mouseY !== undefined) {
    let moveX = event.clientX - mouseX;
    let moveY = event.clientY - mouseY;

    image.style.left = moveX + "px";
    image.style.top = moveY + "px";
  }
});

document.addEventListener("mouseup", function(event) {
  mouseX = undefined;
  mouseY = undefined;
});
示例2:拖拽一个可编辑的div
首先在html页面中添加一个可编辑的div:
<div id="drag-div" contenteditable="true">可编辑div</div>
然后在javascript中实现拖拽效果:
const div = document.getElementById("drag-div");
let mouseX, mouseY;

div.addEventListener("mousedown", function(event) {
  mouseX = event.clientX - div.offsetLeft;
  mouseY = event.clientY - div.offsetTop;
});

document.addEventListener("mousemove", function(event) {
  if (mouseX !== undefined && mouseY !== undefined) {
    let moveX = event.clientX - mouseX;
    let moveY = event.clientY - mouseY;

    div.style.left = moveX + "px";
    div.style.top = moveY + "px";
  }
});

document.addEventListener("mouseup", function(event) {
  mouseX = undefined;
  mouseY = undefined;
});
结语
以上就是实现javascript模拟拖拽效果的攻略,希望对读者有所帮助。
 Layui treetable 复选框联动解决方案treetable.js没有checked做联动。于是自己基于treetable开发的一个小功能,希望能和大家一起交流一下。 1. 在当前HTML文档checked监听函数中增加以下代码 //联动 table.on(
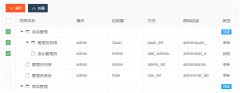
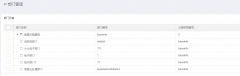 layui扩展的树形表格treetablelayui开发时,遇到要求做成这样的树形表格的需求。这里我们要用到layui的第三方控件treetable,最终实现效果如下图所示: 引入控件: layui.config({ base: '/js/' //直接