R Shiny + plotly:使用 javascript 更改轨迹的颜色,而不影响多个图中的标记和图例
时间:2023-09-30问题描述
This is a follow up question based on THIS post.
The demo app here is a closer representation of my more complex situation of my real shiny app that I'm trying to improve by replacing code that causes re-rendering of plotly objects by javascript codes that alter the existing plots.
This app has:
- 4 plots with unique ID's
- sets of 2 plots listen to the same set of colourInputs, 1 for each trace in each plot
- the legend and marker size in all plots are linked to numericInputs
The modification of the javascript from the previous question for this solution would need to:
- follow the size inputs
- follow the trace - colourInput linking
- target trace n in 2 plots based on colourInput n belonging to those 2 plots.
EDIT: slightly simplified scenario Lets drop the legend issue for now, since the solution part 2 by Stephane does what I want for the colors. I'll deal with the legend sizing later.
The modified version might be a little clearer.
The javascript should:
if plot id is "plot1" or "plot2" listen to color-set1-1 till -3
if plot id is 'plot3' or 'plot4', lister to color-set2-1 till -3
I suppose we need some to add some lines in the js like: "
"var setnr = parseInt(id.split('-')[1]) ;",
to see which set of buttons we are looking at, followed by an if statement that achieves:
 if 'setnr'  == set1 , then var plots =  plot1, plot2
    else if 'setnr == set2, then var plots = plot3, plot4
and then update the trace in 'plots'
In the new app, the color-set1-1, color-set1-2, color-set1-3 still target all 4 plots.
library(plotly)
library(shiny)
library(colourpicker)
library(htmlwidgets)

js <- c(
  "function(el,x){",
  "  $('[id^=Color]').on('change', function(){",
  "    var color = this.value;",
  "    var id = this.id;",
  "    var index = parseInt(id.split('-')[1]) - 1;",
  "    var data = el.data;",
  "    var marker = data[index].marker;",
  "    marker.color = color;",
  "    Plotly.restyle(el, {marker: marker}, [index]);",
  "  });",
  "}")

ui <- fluidPage(
  fluidRow(
    column(4,plotlyOutput("plot1")),
    column(4,plotlyOutput("plot2")),
    column(4,
    colourInput("Color-1", "Color item 1", value = "blue"),  # these buttons will become named Color-set1-1, Color-set1-2, Color-set1-3
    colourInput("Color-2", "Color item 2", value = "red"),  # but that requires an extra change to the js
    colourInput("Color-3", "Color item 3", value = "green")
  )
    ),
  fluidRow(
    column(4,plotlyOutput("plot3")),
    column(4,plotlyOutput("plot4")),
    column(4,
           colourInput("Color-set2-1", "Color item 1", value = "blue"),
           colourInput("Color-set2-2", "Color item 2", value = "red"),
           colourInput("Color-set2-3", "Color item 3", value = "green")
    )
  )

)

server <- function(input, output, session) {
  values <- reactiveValues(colors1 = c('red', 'blue', 'black'), colors2 = c('yellow', 'blue', 'green')  )

  myplotly <- function(THEPLOT, xvar, setnr) {
    markersize <- input[[paste('markersize', THEPLOT, sep = '_')]]
    markerlegendsize <- input[[paste('legendsize', THEPLOT, sep = '_')]]
    colors <- isolate ({values[[paste('colors', setnr, sep = '')]]  })
    p <- plot_ly(source = paste('plotlyplot', THEPLOT, sep = '.'))
    p <-  add_trace(p, data = mtcars, x = mtcars[[xvar]], y = ~mpg, type = 'scatter', mode = 'markers', color = ~as.factor(cyl), colors = colors)
    p <- layout(p, title = 'mtcars group by cyl with switching colors')
    p <- plotly_build(p)
    p  %>% onRender(js)
    }

  output$plot1 <- renderPlotly({ myplotly('plot1', 'hp', 1) })
  output$plot2 <- renderPlotly({ myplotly('plot2', 'disp', 1)})
  output$plot3 <- renderPlotly({ myplotly('plot3','hp', 2)})
  output$plot4 <- renderPlotly({ myplotly('plot4', 'disp', 2)})

}

shinyApp(ui, server)
The original APP:
library(plotly)
library(shiny)
library(htmlwidgets)
library(colourpicker)
library(shinyjs)

## javascript from previous question's answer:
jsCode <- "shinyjs.changelegend = function(){
var paths = d3.select('#plot1').
select('.legend').
select('.scrollbox').
selectAll('.traces').
select('.scatterpts')
.attr('d','M8,0A8,8 0 1,1 0,-8A8,8 0 0,1 8,0Z');}"

ui <- fluidPage(
  tags$script(src = "https://d3js.org/d3.v4.min.js"),
  useShinyjs(),
  extendShinyjs(text = jsCode),
  fluidRow(
    column(2,numericInput(inputId = 'markersize_plot1', label = 'marker', min = 1, max = 40, value = 20)),
    column(2,numericInput(inputId = 'legendsize_plot1', label = 'legend', min = 1, max = 40, value = 10)),
    column(2,numericInput(inputId = 'markersize_plot2', label = 'marker', min = 1, max = 40, value = 4)),
    column(2,numericInput(inputId = 'legendsize_plot2', label = 'legend', min = 1, max = 40, value = 20))
  ),
  fluidRow(
    column(4,plotlyOutput("plot1")),
    column(4,plotlyOutput("plot2")),
    column(2,uiOutput('buttons_color_1'))
  ),
fluidRow(
  column(2,numericInput(inputId = 'markersize_plot3', label = 'marker', min = 1, max = 40, value = 10)),
  column(2,numericInput(inputId = 'legendsize_plot3', label = 'legend', min = 1, max = 40, value = 30)),
  column(2,numericInput(inputId = 'markersize_plot4', label = 'marker', min = 1, max = 40, value = 7)),
  column(2,numericInput(inputId = 'legendsize_plot4', label = 'legend', min = 1, max = 40, value = 40))
),
  fluidRow(
    column(4,plotlyOutput("plot3")),
    column(4,plotlyOutput("plot4")),
    column(2,uiOutput('buttons_color_2'))
    )
)


server <- function(input, output, session) {
  values <- reactiveValues(colors1 = c('red', 'blue', 'black'), colors2 = c('yellow', 'blue', 'green')  )


  lapply(c(1:2), function(i) {
  output[[paste('buttons_color_', i,sep = '')]] <- renderUI({
    isolate({ lapply(1:3, function(x) {  ## 3 in my app changes based on clustering output of my model
      Idname <- if(i == 1) { COLElement_1(x) } else {COLElement_2(x) }
      div(colourpicker::colourInput(inputId = Idname, label = NULL,
                                    palette = "limited", allowedCols = TheColors,
                                    value = values[[paste('colors', i, sep = '')]][x],
                                    showColour = "background", returnName = TRUE),
          style = " height: 30px; width: 30px; border-radius: 6px;  border-width: 2px; text-align:center; padding: 0px; display:block; margin: 10px")
    })
    })})

  outputOptions(output, paste('buttons_color_', i,sep = ''), suspendWhenHidden=FALSE)
  })


  COLElement_1 <-    function(idx){sprintf("COL_button_1-%d",idx)}
  lapply(1:3, function(ob) {
  COLElement_1 <- COLElement_1(ob)
  observeEvent(input[[COLElement_1]], {
    values[[paste('colors', 1, sep = '')]][ob] <- input[[COLElement_1]]
    plotlyProxy("plot1", session) %>%
      plotlyProxyInvoke("restyle", list(marker = list(color = input[[COLElement_1]])), list(as.numeric(ob)-1))
    plotlyProxy("plot2", session) %>%
      plotlyProxyInvoke("restyle", list(marker = list(color = input[[COLElement_1]])), list(as.numeric(ob)-1))
  })
  })

  COLElement_2 <-    function(idx){sprintf("COL_button_2-%d",idx)}
  lapply(1:3, function(ob) {

  COLElement_2 <- COLElement_2(ob)
  observeEvent(input[[COLElement_2]], {
    values[[paste('colors', 2, sep = '')]][ob] <- input[[COLElement_2]]
    plotlyProxy("plot3", session) %>%
      plotlyProxyInvoke("restyle", list(marker = list(color = input[[COLElement_2]])), list(as.numeric(ob)-1))
    plotlyProxy("plot4", session) %>%
      plotlyProxyInvoke("restyle", list(marker = list(color = input[[COLElement_2]])), list(as.numeric(ob)-1))
  })
  })

  myplotly <- function(THEPLOT, xvar, setnr) {
    markersize <- input[[paste('markersize', THEPLOT, sep = '_')]]
    markerlegendsize <- input[[paste('legendsize', THEPLOT, sep = '_')]]
    colors <- isolate ({values[[paste('colors', setnr, sep = '')]]  })
    p <- plot_ly(source = paste('plotlyplot', THEPLOT, sep = '.'))
    p <-  add_trace(p, data = mtcars, x = mtcars[[xvar]], y = ~mpg, type = 'scatter', mode = 'markers', color = ~as.factor(cyl), colors = colors)
    p <- layout(p, title = 'mtcars group by cyl with switching colors')
    p <- plotly_build(p)


    # this is a bit of a hack to change the size of the legend markers to not be equal to the plot marker size.
    # it makes a list of 1 size value for each marker in de trace in the plot, and another half of with sizes that are a lot bigger.
    # the legend marker size is effectively the average size of all markers of a trace
    for(i in seq(1, length(sort(unique(mtcars$cyl) )))) {
      length.group <- nrow(mtcars[which(mtcars$cyl  == sort(unique(mtcars$cyl))[i]), ])
      p$x$data[[i]]$marker$size <- c(rep(markersize,length.group), rep(c(-markersize+2*markerlegendsize), length.group))
    }
    p
  }


output$plot1 <- renderPlotly({ myplotly('plot1', 'hp', 1) })
output$plot2 <- renderPlotly({ myplotly('plot2', 'disp', 1)})
output$plot3 <- renderPlotly({ myplotly('plot3','hp', 2)})
output$plot4 <- renderPlotly({ myplotly('plot4', 'disp', 2)})
}

shinyApp(ui, server)
I'm lost :) Let's start. Here is an app allowing to change the marker size:
library(plotly)
library(shiny)

js <- paste(c(
  "$(document).ready(function(){",
  "  $('#size').on('change', function(){",
  "    var size = Number(this.value);",
  "    var plot = document.getElementById('plot');",
  "    var data = plot.data;",
  "    $.each(data, function(index,value){",
  "      var marker = data[index].marker;",
  "      marker.size = size;",
  "      Plotly.restyle(plot, {marker: marker}, [index]);",
  "    });",
  "  });",
  "})"), sep = "
")

ui <- fluidPage(
  tags$head(
    tags$script(HTML(js))
  ),
  plotlyOutput("plot"),
  numericInput("size", "Size", value = 5, min = 1, max = 15)
)

server <- function(input, output, session) {

  output$plot <- renderPlotly({
    p <- plot_ly()
    for(name in c("drat", "wt", "qsec"))
    {
      p <- add_markers(p, x = as.numeric(mtcars$cyl), y = as.numeric(mtcars[[name]]), name = name)
    }
    p
  })

}

shinyApp(ui, server)
And here is an app allowing to change the marker color:
library(plotly)
library(shiny)
library(colourpicker)
library(htmlwidgets)

js <- c(
  "function(el,x){",
  "  $('[id^=Color]').on('change', function(){",
  "    var color = this.value;",
  "    var id = this.id;",
  "    var index = parseInt(id.split('-')[1]) - 1;",
  "    var data = el.data;",
  "    var marker = data[index].marker;",
  "    marker.color = color;",
  "    Plotly.restyle(el, {marker: marker}, [index]);",
  "  });",
  "}")

ui <- fluidPage(
  plotlyOutput("plot"),
  colourInput("Color-1", "Color item 1", value = "blue"),
  colourInput("Color-2", "Color item 2", value = "red"),
  colourInput("Color-3", "Color item 3", value = "green")
)

server <- function(input, output, session) {

  output$plot <- renderPlotly({
    p <- plot_ly()
    for(name in c("drat", "wt", "qsec"))
    {
      p <- add_markers(p, x = as.numeric(mtcars$cyl), y = as.numeric(mtcars[[name]]), name = name)
    }
    p %>% onRender(js)
  })

}

shinyApp(ui, server)
Does it help?
这篇关于R Shiny + plotly:使用 javascript 更改轨迹的颜色,而不影响多个图中的标记和图例的文章就介绍到这了,希望我们推荐的答案对大家有所帮助,也希望大家多多支持跟版网!
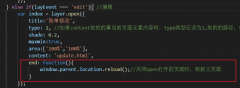 layer.open打开的页面关闭时,父页面刷新的方法layer.open打开的页面关闭时,父页面刷新的方法,在layer.open中添加: end: function(){ window.parent.location.reload();//关闭open打开的页面时,刷新父页面 }