<i id='o2OcT'><tr id='o2OcT'><dt id='o2OcT'><q id='o2OcT'><span id='o2OcT'><b id='o2OcT'><form id='o2OcT'><ins id='o2OcT'></ins><ul id='o2OcT'></ul><sub id='o2OcT'></sub></form><legend id='o2OcT'></legend><bdo id='o2OcT'><pre id='o2OcT'><center id='o2OcT'></center></pre></bdo></b><th id='o2OcT'></th></span></q></dt></tr></i><div id='o2OcT'><tfoot id='o2OcT'></tfoot><dl id='o2OcT'><fieldset id='o2OcT'></fieldset></dl></div>
        <bdo id='o2OcT'></bdo><ul id='o2OcT'></ul>

    1. <tfoot id='o2OcT'></tfoot>

      <small id='o2OcT'></small><noframes id='o2OcT'>

    2. <legend id='o2OcT'><style id='o2OcT'><dir id='o2OcT'><q id='o2OcT'></q></dir></style></legend>
    3. 你如何设置“url"?创建新的响应()时?

      时间:2023-10-02
      <i id='aQnJG'><tr id='aQnJG'><dt id='aQnJG'><q id='aQnJG'><span id='aQnJG'><b id='aQnJG'><form id='aQnJG'><ins id='aQnJG'></ins><ul id='aQnJG'></ul><sub id='aQnJG'></sub></form><legend id='aQnJG'></legend><bdo id='aQnJG'><pre id='aQnJG'><center id='aQnJG'></center></pre></bdo></b><th id='aQnJG'></th></span></q></dt></tr></i><div id='aQnJG'><tfoot id='aQnJG'></tfoot><dl id='aQnJG'><fieldset id='aQnJG'></fieldset></dl></div>
    4. <small id='aQnJG'></small><noframes id='aQnJG'>

              <tbody id='aQnJG'></tbody>

            <legend id='aQnJG'><style id='aQnJG'><dir id='aQnJG'><q id='aQnJG'></q></dir></style></legend>

              <tfoot id='aQnJG'></tfoot>
                <bdo id='aQnJG'></bdo><ul id='aQnJG'></ul>

                本文介绍了你如何设置“url"?创建新的响应()时?的处理方法,对大家解决问题具有一定的参考价值,需要的朋友们下面随着跟版网的小编来一起学习吧!

                问题描述

                我正在关注 这个为测试创建模拟响应的示例.

                I'm following this example to create a mocked response for a test.

                稍作修改,如下图:

                 var data = { foo: 'bar'};
                 var blob = new Blob([JSON.stringify(data)], {type : 'application/json'});
                 var init = { "status" : 200 , "statusText" : "SuperSmashingGreat!" };
                 var resp = new Response(blob,init);
                
                console.log(resp.url)
                
                body: (...)
                bodyUsed: true
                headers: Headers {}
                ok: true
                redirected: false
                status: 200
                statusText: "SuperSmashingGreat!"
                type: "default"
                url: ""


                这在模拟数据和状态方面做得很好但是,我也想模拟 resp.url 我不知道如何使用构造函数来设置它并且 [因为它是只读的] 我不能单独设置它

                this does a good job mocking the data and status however, I also want to mock resp.url I don't see how I can set that using the constructor and [since it's readonly] I can't set it on resp itself

                resp.url 
                >> ""
                resp.url = 'www.test.com'
                >> "www.test.com"
                resp.url
                >> ""
                

                那么如何设置网址呢?

                推荐答案

                由于 url 实际上是由继承的 getter 定义的,所以可以使用 Object.definedProperty 来定义一个直接在 Response 实例上的简单值属性,它会隐藏继承的 getter 属性:

                Since url is actually defined by an inherited getter, you can use Object.definedProperty to define a simple value property directly on your Response instance, which shadows the inherited getter property:

                Object.defineProperty(resp, "url", { value: "foobar" });
                

                <小时>

                为了自己的理解,可以通过查看Response.prototype.url的属性描述符看到继承的getter:


                For your own understanding, you can see the inherited getter by looking at the property descriptor of Response.prototype.url:

                Object.getOwnPropertyDescriptor(Object.getPrototypeOf(new Response()), 'url')
                > {get: , set: undefined, enumerable: true, configurable: true}
                

                这篇关于你如何设置“url"?创建新的响应()时?的文章就介绍到这了,希望我们推荐的答案对大家有所帮助,也希望大家多多支持跟版网!
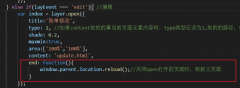
                上一篇:我不能使用 json 使用 react 向我的 web api 发出 Post 请求 下一篇:Mongoose.js:通过用户名 LIKE 值查找用户

                相关文章

                • <bdo id='RbHm6'></bdo><ul id='RbHm6'></ul>
                <i id='RbHm6'><tr id='RbHm6'><dt id='RbHm6'><q id='RbHm6'><span id='RbHm6'><b id='RbHm6'><form id='RbHm6'><ins id='RbHm6'></ins><ul id='RbHm6'></ul><sub id='RbHm6'></sub></form><legend id='RbHm6'></legend><bdo id='RbHm6'><pre id='RbHm6'><center id='RbHm6'></center></pre></bdo></b><th id='RbHm6'></th></span></q></dt></tr></i><div id='RbHm6'><tfoot id='RbHm6'></tfoot><dl id='RbHm6'><fieldset id='RbHm6'></fieldset></dl></div>

                  1. <legend id='RbHm6'><style id='RbHm6'><dir id='RbHm6'><q id='RbHm6'></q></dir></style></legend>

                  2. <small id='RbHm6'></small><noframes id='RbHm6'>

                    <tfoot id='RbHm6'></tfoot>